Showing posts with label MS_Power_Point. Show all posts

Friday, 31 October 2014

Lesson no 15 = How To Save Your PowerPoint Presentation As A Web Page?

Saving your Microsoft PowerPoint presentation as a web page allows you to then post it to the web. PowerPoint is able to retain the presentation's integrity so that viewers on the web are able to see it as though the presentation was being run as normal. The advantage of publishing your presentation to the web like this is that you always have it available to you - provided that you have internet access, of course. The bad news is that PowerPoint 2010 does not have that functionality - boo! However, in Microsoft Office 2010, there is a web versions of PowerPoint, so that may be the reason this functionality has been removed.
Nevertheless, if you have a version of PowerPoint between 2000 and 2007 inclusive, you will be able to save your presentation as a web page.
To save a PowerPoint presentation as a web page, click File > Save As A Web Page. When the Save As dialogue box appears, use the Save In box to navigate to the location of your web server. Don't forget to name your presentation and then click Publish.
The Publish as a Web Page dialog box will appear. Here, you need to make selections to customise how your presentation will be displayed. Under Publish What, select Complete presentation if you want to publish all slides or choose a selection of slides you want to publish. Leave the check next to Display speaker notes if you want them to be available.
In the Browser Support section, select the following:
  • Microsoft Internet Explorer 4.0 or later ( high fidelity) if you want your presentation to be viewed only in Internet Explorer. This takes full advantage of the presentation and allows you to view in full screen. If you know your audience will be using Internet Explorer then this is the best choice to make. It will, however, work in the Latest version of Netscape. You just can’t do the full screen.) This method of saving usually (or used to!) looks the best.
  • Microsoft Internet Explorer or Netscape 3.0 or later. If some of your audience will be using Netscape (older versions than the newest one), then you should make this your choice.
  • All browsers listed above. This will create larger files but if your audience is using IE or Netscape and file size is not an issue then you can choose this type.
In the File name box, type in the path to where you want to save (on your web server) or click on the Browse button to browse to it.
Click the Web Options button and then click on the drop down next to the Colours box and choose the colours you want for the text and background of the outline. Here the default options are usually sufficient, but modify them to suit your needs. Click OK and then click Publish.
This creates two files. If you called your show "ImprovingEfficiency" then after saving the file you will have created a folder called ImprovingEfficiency_files and a .htm file called ImprovingEfficiency.htm. If you are using FrontPage you can import these files into your web site. Create a link to the ImprovingEfficiency.htm file. When your visitors click on this link it will open up the PowerPoint show.
The show should open up in a browser to preview it.

Lesson no 14 = Saving Your New PowerPoint Presentation

When you create a PowerPoint presentation you will have to save it at some point - and it's better if you do this sooner rather than later. It's also a good idea to keep saving your work periodically as you never know when you will lose power or when your computer is likely to crash. Keep saving! If you don't, sooner or later you will lose some of your hard work. It's happened to us all, and saving your changes takes so little time that there is no excuse.
If you are working on a new presentation, the first time you save, PowerPoint will prompt you to give it a name and locate a place on your computer to save it. There are two ways to save: using the ribbon and using the keyboard shortcut. Let's look at using the ribbon first: click the File tab > Save.
Saving Your PowerPoint presentation
The usual save as dialogue box will appear, prompting you to supply a name and location for the presentation. Here is that dialogue box, for those who haven't seen it before:
Saving Your PowerPoint presentation
Think of a meaningful name for your presentation and type it into the File name input box. Try to avoid names like Presentation2 as you will soon forget what the purpose of the presentation is. It's better to use names like "Introducing Science" etc. Once you have named your presentation, navigate to a location on your computer's hard drive and save it there.
There is a quicker way of saving presentations using keyboard shortcuts. You can also perform a file save by pressing ctrl-s. If this is the first time you have saved your presentation, you will again be prompted to name it and find a place for it to be stored. Thereafter, you can periodically press ctrl-s and your changes will be saved immediately.

Lesson no 13 = PowerPoint Pointer

The pointer in PowerPoint is a really good tool to draw attention to elements you want your audience to focus on. While you are running your presentation, you can activate the pointer and then draw, write or highlight anything you want on the screen. This is a visual aid for your audience and so this tool is only available when you are running your presentation.
To activate the pointer, right click on any slide and select Pointer Options > Pen. There are three options available for the pointer:
  • Arrow - this is the default pointer and is good for pointing at things.
  • Pen - the pen pointer is good for drawing a circle around things and for impromptu writing.
  • Highlighter - the highlighter pointer applies a highlight background, similar to the highlighting you can do in Microsoft Word.
To use the pen and highlighter, you will need to click and drag.
Pointer Options In PowerPoint
Here's an example of the pen pointer in use:
The Pen Pointer In PowerPoint
You can change the colour of the ink used by right clicking again and selecting Pointer Options > Ink Colour. Select the new colour and it will be used on all new drawings. It won't affect anything you've already drawn.
Here's an example of the highlighter in use:
The Highlighter In PowerPoint
You can change the ink colour of the highlighter in the same way that you can change the ink colour for the pen pointer.
At the end of your presentation, if you've drawn anything on a slides, PowerPoint asks whether you'd like to keep your ink annotations.
Keep Ink Annotations In PowerPoint
If you choose Keep, what you have drawn is saved on the slide and will be displayed next time the presentation is run. The drawing is saved as an object that you can edit afterwards.

Lesson no 12 = Slide Show Presentation

At any time during the creation of your PowerPoint presentation, you can run it to see a preview. This will show you how your presentation looks when you run it for real.
There are several ways to start your presentation. You can:
  • click on the Slide Show button at the bottom of your workspace (next to the zoom slide)
  • press F5
  • click Slide Show in the ribbon > Start Slide Show, and then choose the most appropriate way to run your slide show.
Generally speaking, you have two options: to start the presentation from the current slide, or from the beginning. In addition, PowerPoint 2010 brings you the power to broadcast slide shows!
Running a PowerPoint presentation

Self-Running PowerPoint Presentations

Microsoft give you the ability to create self-running PowerPoint presentations, which are a great way to communicate information without having to have someone available to run a slide show presentation. For example, you might want to set up a presentation to run unattended in a booth or kiosk at a trade show or convention, or send a CD with a self-running slide show to a client. A self-running presentation restarts when it has finished and also when it has been idle on a manually advanced slide for longer than five minutes.

Lesson no 11 = Animation For PowerPoint

To add a custom animation to an object in Microsoft PowerPoint, first of all select the object, then click animation in the ribbon to see all the animation options we have at our disposal. We can see a few thumbnail images representing entrance effects in the animation group.
Add a custom animation in PowerPoint
That's not a very big selection of effects. To see more effects, click on the dialogue launcher at the bottom right of the Animation group. A more comprehensive selection of effects is then displayed in a thumbnail gallery, in the categories of:
  • Entrance - this kind of animation brings the object onto the PowerPoint slide from a location off the slide
  • Emphasis - once the object is on the slide, you can give it some emphasis with this kind of animation
  • Exit - animations in this category remove the object from a slide
  • Motion Paths - applying this kind of animation allows us to plot a path for the object to follow
A thumbnail gallery of PowerPoint animations

Previewing Animations

When you hover your mouse over the thumbnail image of an animation, you can see a preview of what that animation would look like if applied. The animation plays once. You also get to see what the animation looks like when you actually apply it to the object. If you want to see a preview of the animation at any other time, click the Preview button to the far left of the Animations tab.
All slides that include an animation display a wooshing star next to the slide in slide view and slide sorter view (read more aboutPowerPoint Views).
To remove an animation from an object, click on the dialogue box launcher and select None at the top.

Lesson no 10 = Inserting Sound In PowerPoint

Careful use of sound in your Microsoft PowerPoint presentation can do wonders to enhance it. However, it's easy to get carried away and if you are not careful, you may confuse and distract the audience too much from the message you are trying to convey. Bear this in mind and be careful to use sound clips sparingly. Used wisely, sound (and video) effects can quickly catch your viewers’ attention.
There are a few different ways to add a sound clip in PowerPoint.

Powerpoint Sound Clips

To insert a sound clip into your PowerPoint presentation, click Insert > Media > Ausio. You'll notice that the audio button is split into two. Click on the lower half of the button and you'll find the following options available to you:
Insert Sound In Microsoft PowerPoint
We'll go through each option now.

Audio From File

This is the most straight forward option. If you have a sound file stored somewhere on your computer, use this option to navigate to it, select it and insert it. The icon representing a sound clip is inserted onto the slide you had selected.
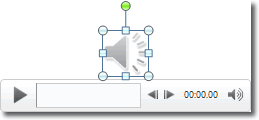
Sound Playback Tools In Microsoft PowerPoint
While the sound clip is selected, you will be able to see the basic sound playback tools below the clip: play, rewind, fast forward and volume controls. You can also position the playback point to a specific place in playback using the timeline. The progress in minutes and seconds also appears to the right of the timeline, to let you know how far through the recording you've progressed.
While the audio clip is selected, you'll also see the Adio Tools contextual tab displayed in the ribbon, allowing you to perform a variety of audio tasks on the clip.
Audio Tools Contextual Tab In Microsoft PowerPoint
The Format tab mostly contains commands for use with video, but the Playback tab can be used with sound clips.

Clip Art Audio

You can use the Clip Art library to insert pre made audio clips in much the same way that you would insert Clip Art images. When you click The Clip Art Audio option, the Clip Art panel appears to the right of the work space but the Results should be selection list is set to Audio.
Clip Art Audio In Microsoft PowerPoint
Type in the type of sound you need into the search box and press Enter or click Go. A selection of sound clips will be displayed for you to insert. Click on a particular clip and it will be inserted.

Record Audio

The record audio option gives you the ability to record your own sound clip within PowerPoint. All you need is a microphone to record your voice. When you take this option, PowerPoint displays a dialogue box that you can use to start and stop recording your voice. Type the name of the clip in the Name box and then click the round and red record button on the right. Stop the recording by clicking the blue rectangle button in the centre and start playback using the blue triangle button on the left.
Record Sound In Microsoft PowerPoint

Lesson no 9 = Adding Transitions To Your PowerPoint Presentation

In Microsoft PowerPoint, slide transitions are motion effects that occur in Slide Show view when you move from one slide to the next during a presentation. You can control the speed, add sound, and even customize the properties of transition effects. To add a transition first of all select a slide in the left hand panel that contains the Slides and Outline tabs (I'd keep it simple and work in the Slides tab). The transition will occur immediately before the selected slide is displayed. Click Transitions > Transition To This Slide, and then click on the transition you want to use. If you want to see a larger selection of transitions, click on the more button (the down arrow at the bottom right of the group.
PowerPoint Transitions
When you hover over a thumbnail image of a transition, you can see a live preview of it applied to your slide. When you move the cursor away, the preview is removed.
If, after having applied a transition to the selected slide, you decide that you want the transition applied to all slides, click on theApply To All button in the Timing Group on the same tab.

Lesson no 8 = How to use Searching Clip Art In PowerPoint?

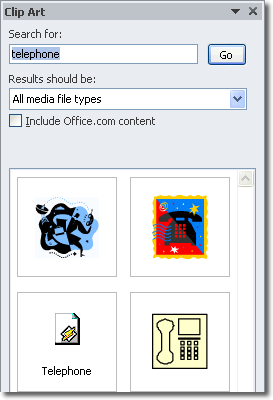
PowerPoint provides a large selection of ready made Clip Art images. These images are simple in design but their use can really help get your point across in your presentation. One advantage of using Clip Art is that the collection of images is right there raedy for you to use. You don't have to go out and take photos for your presentation, and you don't have to touch Photoshop. When you click the Clip Art button, the Clip Art panel opens on the right of the workspace.
Insert Clip Art
We can use this panel to search for Clip Art images of certain things. In the image above, I searched for "telephone" and found four related images. To narrow down the saerch, you can click on the Results should be drop down list and select one of the categories of:
  • Illustrations
  • Photographs
  • Videos
  • Audios
To insert a Clip Art image, click on it. You'll notice that the Picture Tools contextual tab appears in the ribbon to help you perform picture related tasks. This tab will remain visible as long as the item of Clip Art (or, indeed, any image) is selected.
If there isn't a big enough selection of Clip Art images for you here, you can always check the Include Office.com content checkbox when you search. Additionally, you can visit the site yourself by clicking the link at the bottom of the panel.
When you have finished working with Clip Art, you can close down the panel to reduce clutter by clicking the "x" in the top right corner.

Lesson no 7 = How to Insert Images In PowerPoint?

Inserting Images In PowerPoint

To insert an image in PowerPoint, click Insert > Images. You can see hat there are four different types of image you can insert here, and we'll explore each one now.
Insert PowerPoint Image

Insert A Picture

If you have an image, for example a photo you have taken, on your PC's hard drive, you would click on the Picture button. Then you would navigate to the place on your hard drive where the picture was located and either double click on it or select it and then click Insert.

Insert Clip Art

When you click the Clip Art button, the Clip Art panel opens on the right of the workspace.
Insert Clip Art
We can use this panel to search for Clip Art images of certain things. In the image above, I searched for "telephone" and found four related images. To narrow down the saerch, you can click on the Results should be drop down list and select one of the categories of:
  • Illustrations
  • Photographs
  • Videos
  • Audios
To insert a Clip Art image, click on it.

Lesson no 6 = Creating A Powerpoint Background

Creating A Powerpoint Background

For the background to your PowerPoint presentation, you can specify the following:
  • A solid fill
  • A gradient fill
  • A picture or texture fill
  • A Pattern fill
To change your presentation background, click Design > Background > Background Styles > Format Background. Alternatively, you can right click on a free area on a slide (and area that doesn't contain an object) and then select Format Background from there.
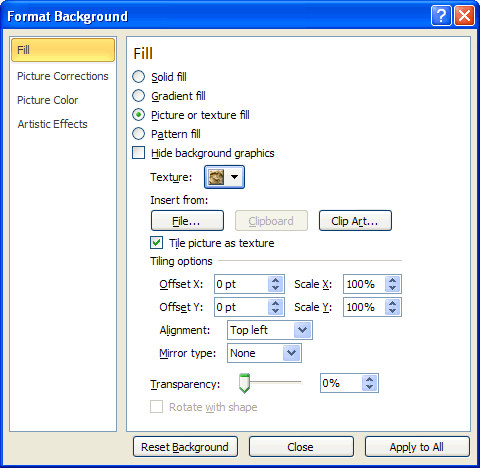
You should now see the Format Background window.
Format Background Window
Ensure that the fill tab is selected (as in the image above) and then make changes according to what kind of background you want for your presentation.

Solid Fill

To specify a solid fill colour, ensure that the appropriate radio button is selected and then click on the Fill Colour swatch. A panel is displayed for you to select a colour.
Fill Colour Swatch
The colours in the main part of the grid are all theme colours, so if you select one, you can be pretty confident that the background will blend in well with the rest of the presentation's colours. At the bottom of the colour selection panel are standard colours and if you want even more colours to choose from, you can click More Colours at the bottom.

Gradient Fill

A gradient is the smooth transition of one colour into another.
Gradient Fill
When this option is selected, you can choose from a selection of ready made gradients by clicking on the Preset colours button. Alternatively, you can exercise more control by defining the gradient yourself. If you do this, you will need to tell PowerPoint whether the gradient is linear, radial, rectangular, path or shade from title. Additionally you will need to specify the gradient direction, angle, where the colours are positioned on the gradient (with the Gradient stops) and the properties of each colour in the gradient. These properties include what the colour is, how bright its is and also how transparent.

Picture Or Texture Fill

When specifying a picture or texture fill for your PowerPoint background, you are actually using a picture as the background.
Picture Or Texture Fill
PowerPoint comes with some built in textures you can use, or you can select an image that is stored on your hard drive. When you select an image in this way, you can choose to have the image appearing just once in the background, or to have it repeating like a texture. As you can see from the screenshot, there are many other attributes you can set that control the picture's appearance.

Pattern Fill

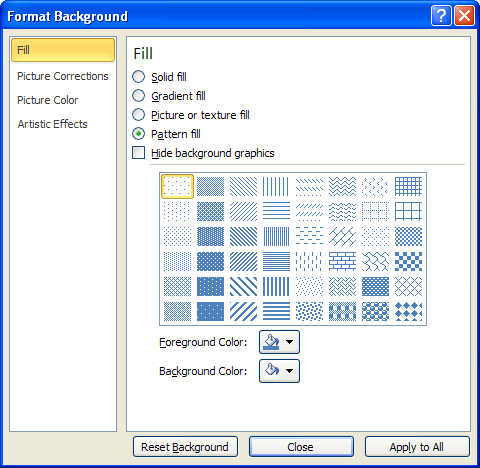
As with textures, PowerPoint ships with a selection of pre-made patterns that you can use as your background.
Pattern Fill
Patterns available for selection include dots, stripes, zig zags, brickwork and many more. You can specify whatever foreground and background colours you want to use.

Resetting The PowerPoint Background

If you decide to reset your background, but you've made so many changes that it would take too long to reverse each one, you can use the Reset Background button at the bottom of the Format Background window. You can also tell PowerPoint to apply the background you just designed to all slides in the presentation - using the Apply to All button. If you don't apply the background to all slides, then only the currently selected slide is affected.

Lesson no 5 = Moving Slides In Powerpoint

Moving Slides In Powerpoint

You've spent time planning how you want your presentation to look and you've painstakingly designed it's look and feel. You've taken great care with every stylish slide you've added. But oh oh, you know see that slide 6 actually belongs before slide 5! What do you do, start again from scratch? There is no need. All you have to do is move the slide. You can change the sequence of your slides by moving them around your presentation.
To move a slide in your presentation, all you have to do is drag and drop it where you need it. As you drag the slide, you should see an insertion point that looks like eithe a horizontal or vertical line, depending on which PowerPoint view you are using, that tells you where your slide will appear.
If you have many slides to move around, and want to get an overall view of how your slides are organised, using the Slide sorter view is your best option.
You can move several slides around as a group by selecting them all first and then dragging and dropping them. To select multiple slides, hold down the control key on your keyboard as you click on additional slides. Alternatively, if the slides you need to select occur in an unbroken sequence, you can select the first slide and then hold down the shift key as you click on the last slide.

Moving Slides With Keyboard Shortcuts

Another way to move slides around is to cut and paste them. Select the slide(s) you want to move and then right click > Cut. Select the slide that is positioned before where you want the slide to go and then right click > Paste. The slide(s) will appear after the selected slide. If you want to speed things up, you can use keyboard shortcuts: select the slide you want to move, press ctrl-x to cut it and then ctrl-v to paste it.
Dragging and dropping your slides is probably the easiest method to use.

Lesson no 4 = How to Add a New File to Presentation?

New Slides Add in presentation

There are a couple of ways to add a new slide. In each way, the slide that is currently selected is important as the new slide will be placed after the selected one. This means that if you want to insert a slide before the end of the presentation, you will need to select the slide that appears before the one you want to insert. To select the slide, just click on it. You can select the slide in whichever view you happen to be using, whether it's Slides View or Outline View.
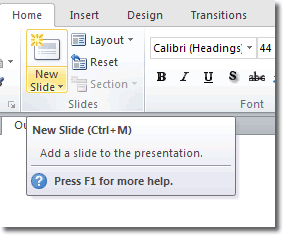
Once you have selected a slide, click Home > Slides > New Slide. You'll notice that the New Slide button is in two halves.
Add a new slide
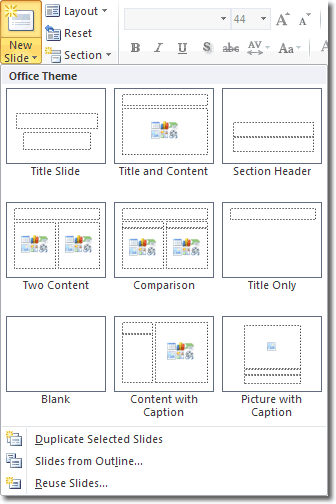
If you click the top half of the New Slide button, the default Title and Content type slide will be added. If, instead, you click the bottom half of the button, you will be able to select what type of slide is added.
Choos what slide type to add
Once the new slide has been added, you can click into one of the editable content boxes to make your changes.
The keyboard shortcut for adding new slides is ctrl-m.

Lesson no 3 = How to open Existing Presentations?

Open Existing Presentations

There are several reasons why you might need to open an existing Microsoft PowerPoint presentation instead of creating a new one. You might have previously saved an incomplete presentation and now need to do some more work on it. Alternatively, you might want to open a complete presentation and actually run it for an audience. Whatever the reason, opening an existing presentation is quite easy.
Start PowerPoint and then click the File tab > Open. The usual Open file dialogue box that you may already be familiar with opens and you use this to locate your presentation.
Open an existing PowerPoint template
When you find your presentation, either double click it to open it, or select it and then click Open. The presentation will then open for you to either work on it or run it.
The keyboard shortcut for opening a presentation the same as that for opening existing documents in other Microsoft Office programs: ctrl-o.

Lesson no 2 = How to use Power Point Template?

Save Time And Effort By Using A PowerPoint Template

One way of creating a presentation is to start from scratch. However, you can save time and effort if you base your new presentation on a template. A template defines the background, font styles, colours and sizes for your placeholders, as well as selected bullets that match the template. Using a template means that you don't need to worry about defining those aspects yourself. PowerPoint comes with a number of stylish templates built in that you can use immediately, and you can download additional ones from office.com.
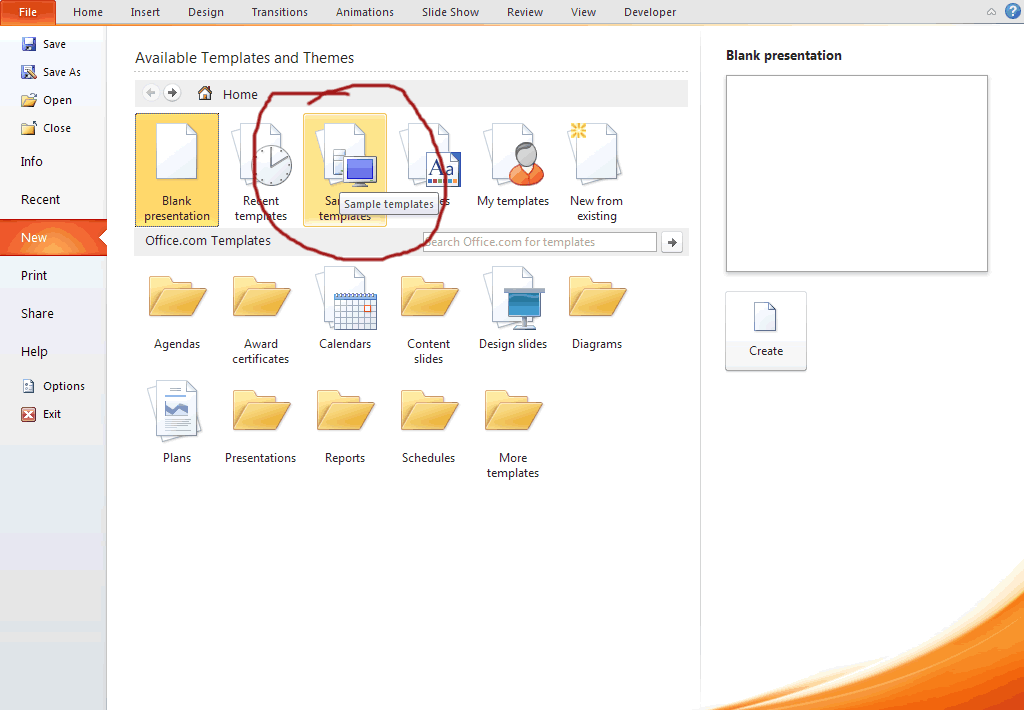
To create a PowerPoint presentation using a template, click the File tab > New, and the following panel will be displayed.
Create a PowerPoint presentation based on a template
Clicking on a template category will display thumbnail images of all the templates within that category. When you find a template you like the look of, click on its thumbnail to select it and you will see a preview of it on the right of the panel. You can then click Create to create your PowerPoint presentation based on this template.
Preview of a PowerPoint template
Sometimes you just can't find a template that precisely matches what you need, and in these circumstances, what many people do is use a template that is the closest fit and then modify it.
There are many free templates available from within PowerPoint, and also freely downloadable from other websites on the internet. In addition to using those that ship with PowerPoint, you can also purchase stylish and professionally designed templates for PowerPoint presentations from vendors like SmileTemplates.

Lesson no 1 = Creating A New PowerPoint Presentation From Scratch?

How to Creating A New PowerPoint Presentation First Time?

There are a variety of ways of creating your PowerPoint presentation, and one of them is to start from scratch. In doing so, you are creating your presentation from a blank presentation, and you have much more flexibility over how it looks. In another tutorial, we will look at how to create a presentation using templates, but for now, to start from scratch click the File tab > New, and the following panel will be displayed (click the image to see a larger version).
Create a PowerPoint presentation from scratch
Ensure that Blank presentation is selected. You can click on the thumbnail image to select it if it isn't, and then click Create (see hints in the image above). A new presentation based on a blank presentation opens for you to start work on. As soon as you can, save the presentation so you don't lose any changes. Learn how to save your presentation.
If you want to sacrifice flexibility for speed, you may prefer instead to create a presentation using a template.